
 Tiếng Việt
Installing eSIM on Android Phones: A Step-by-Step Guide
Install eSIM on Android phones: A step-by-step guide for adding travel eSIM to your Android device.
1. Install eSIM on Android
To add an eSIM to an eSIM-enabled device, follow these steps:
Step 1: Go to Settings → Connections → SIM manager

Step 2: Select Add eSIM → Scan QR code from service provider
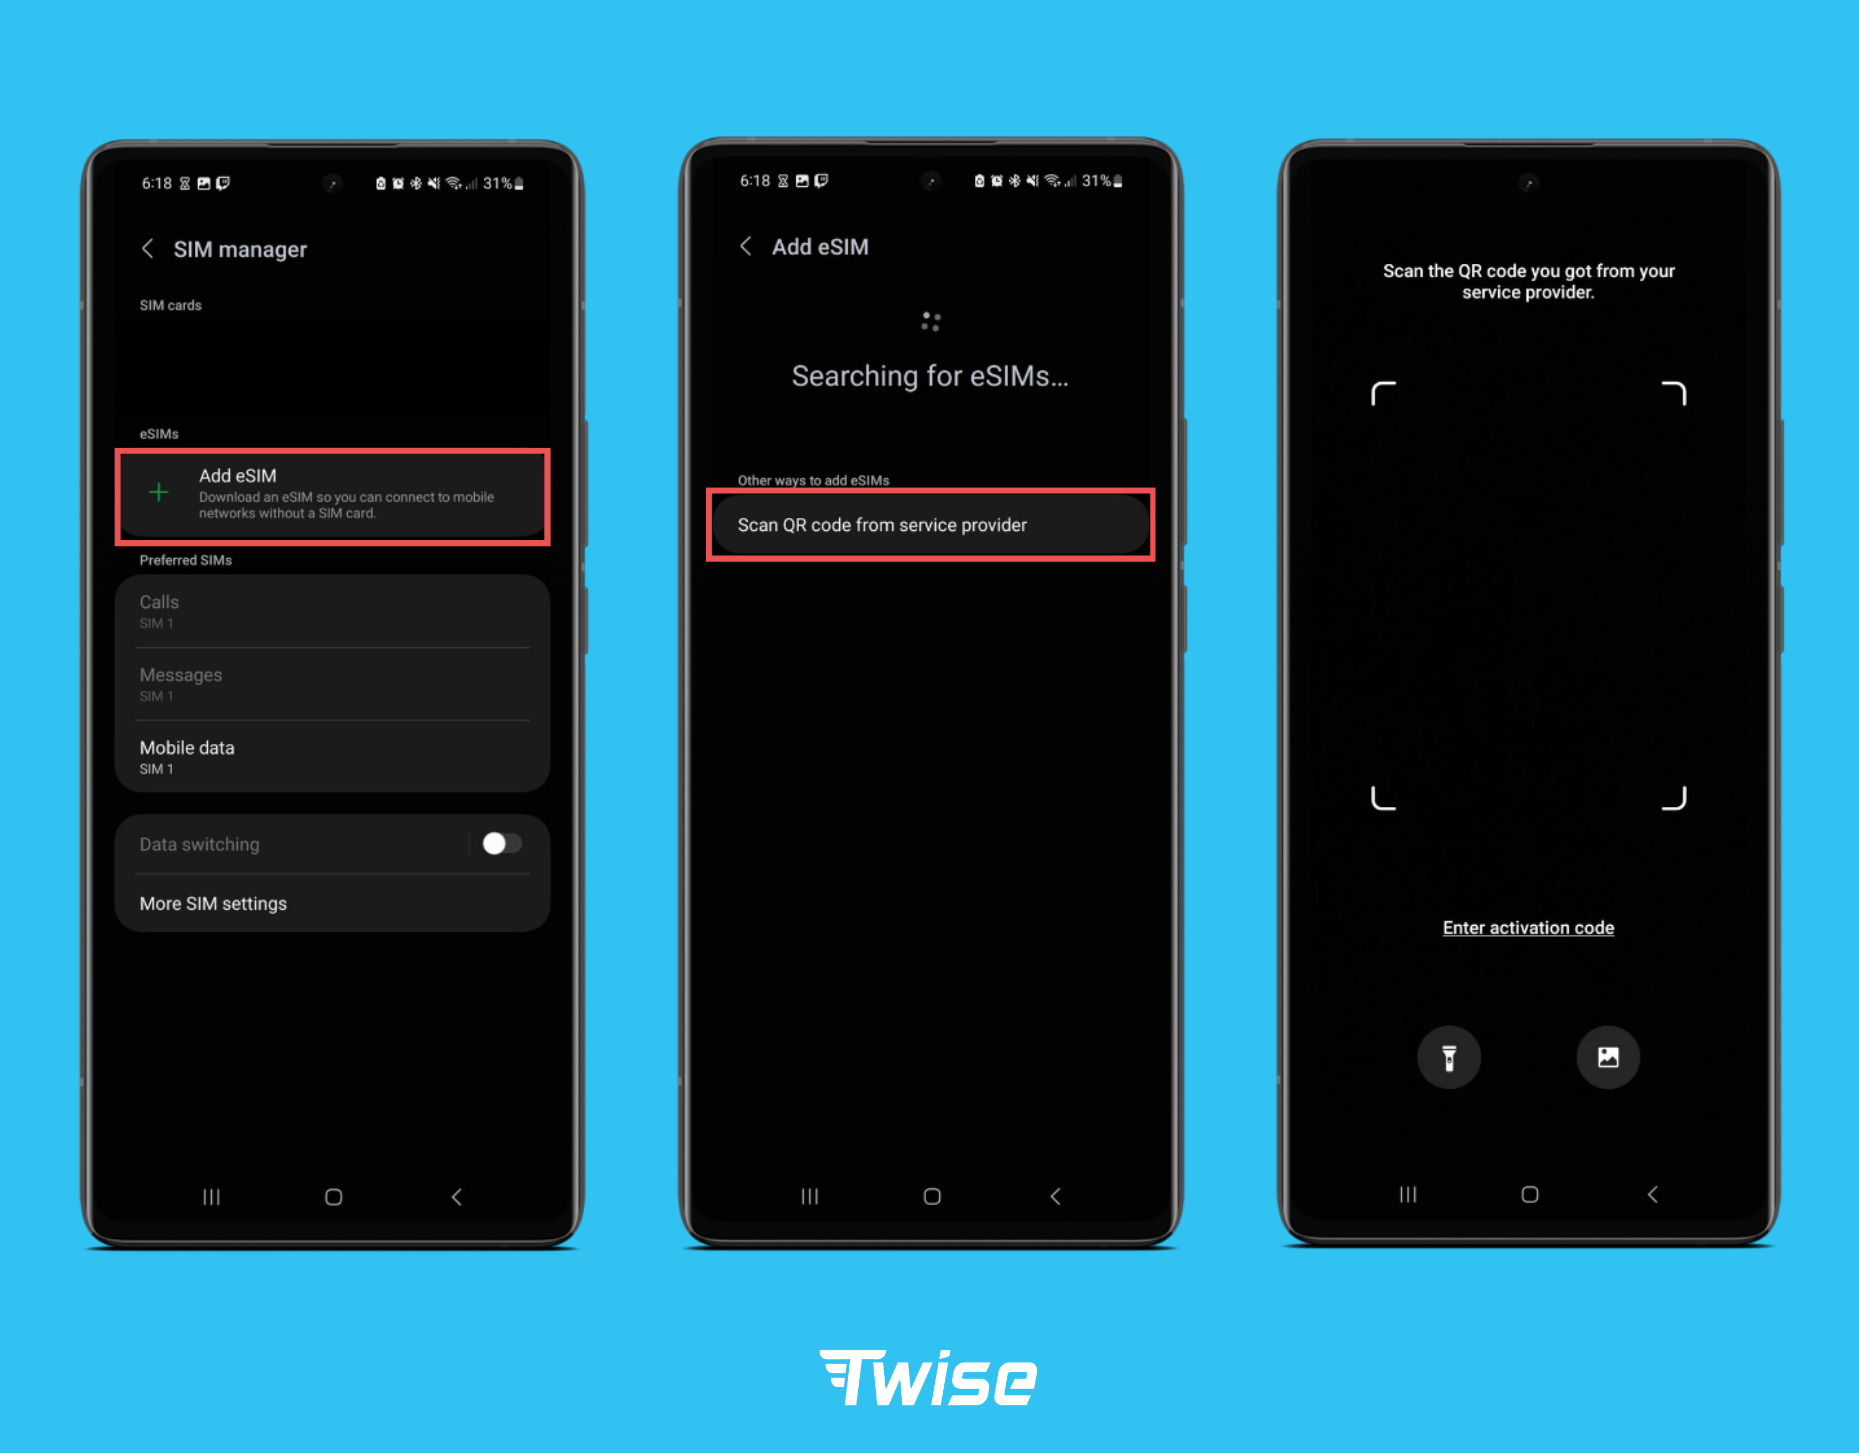
Step 3: Click confirm to finish install eSIM on Android device! Initially, your eSIM will be designated as Secondary. You can optionally rename this newly added eSIM profile. For easy identification, we recommend naming the label “Twise”
Alternatively, you can also set up an eSIM manually by following these steps:
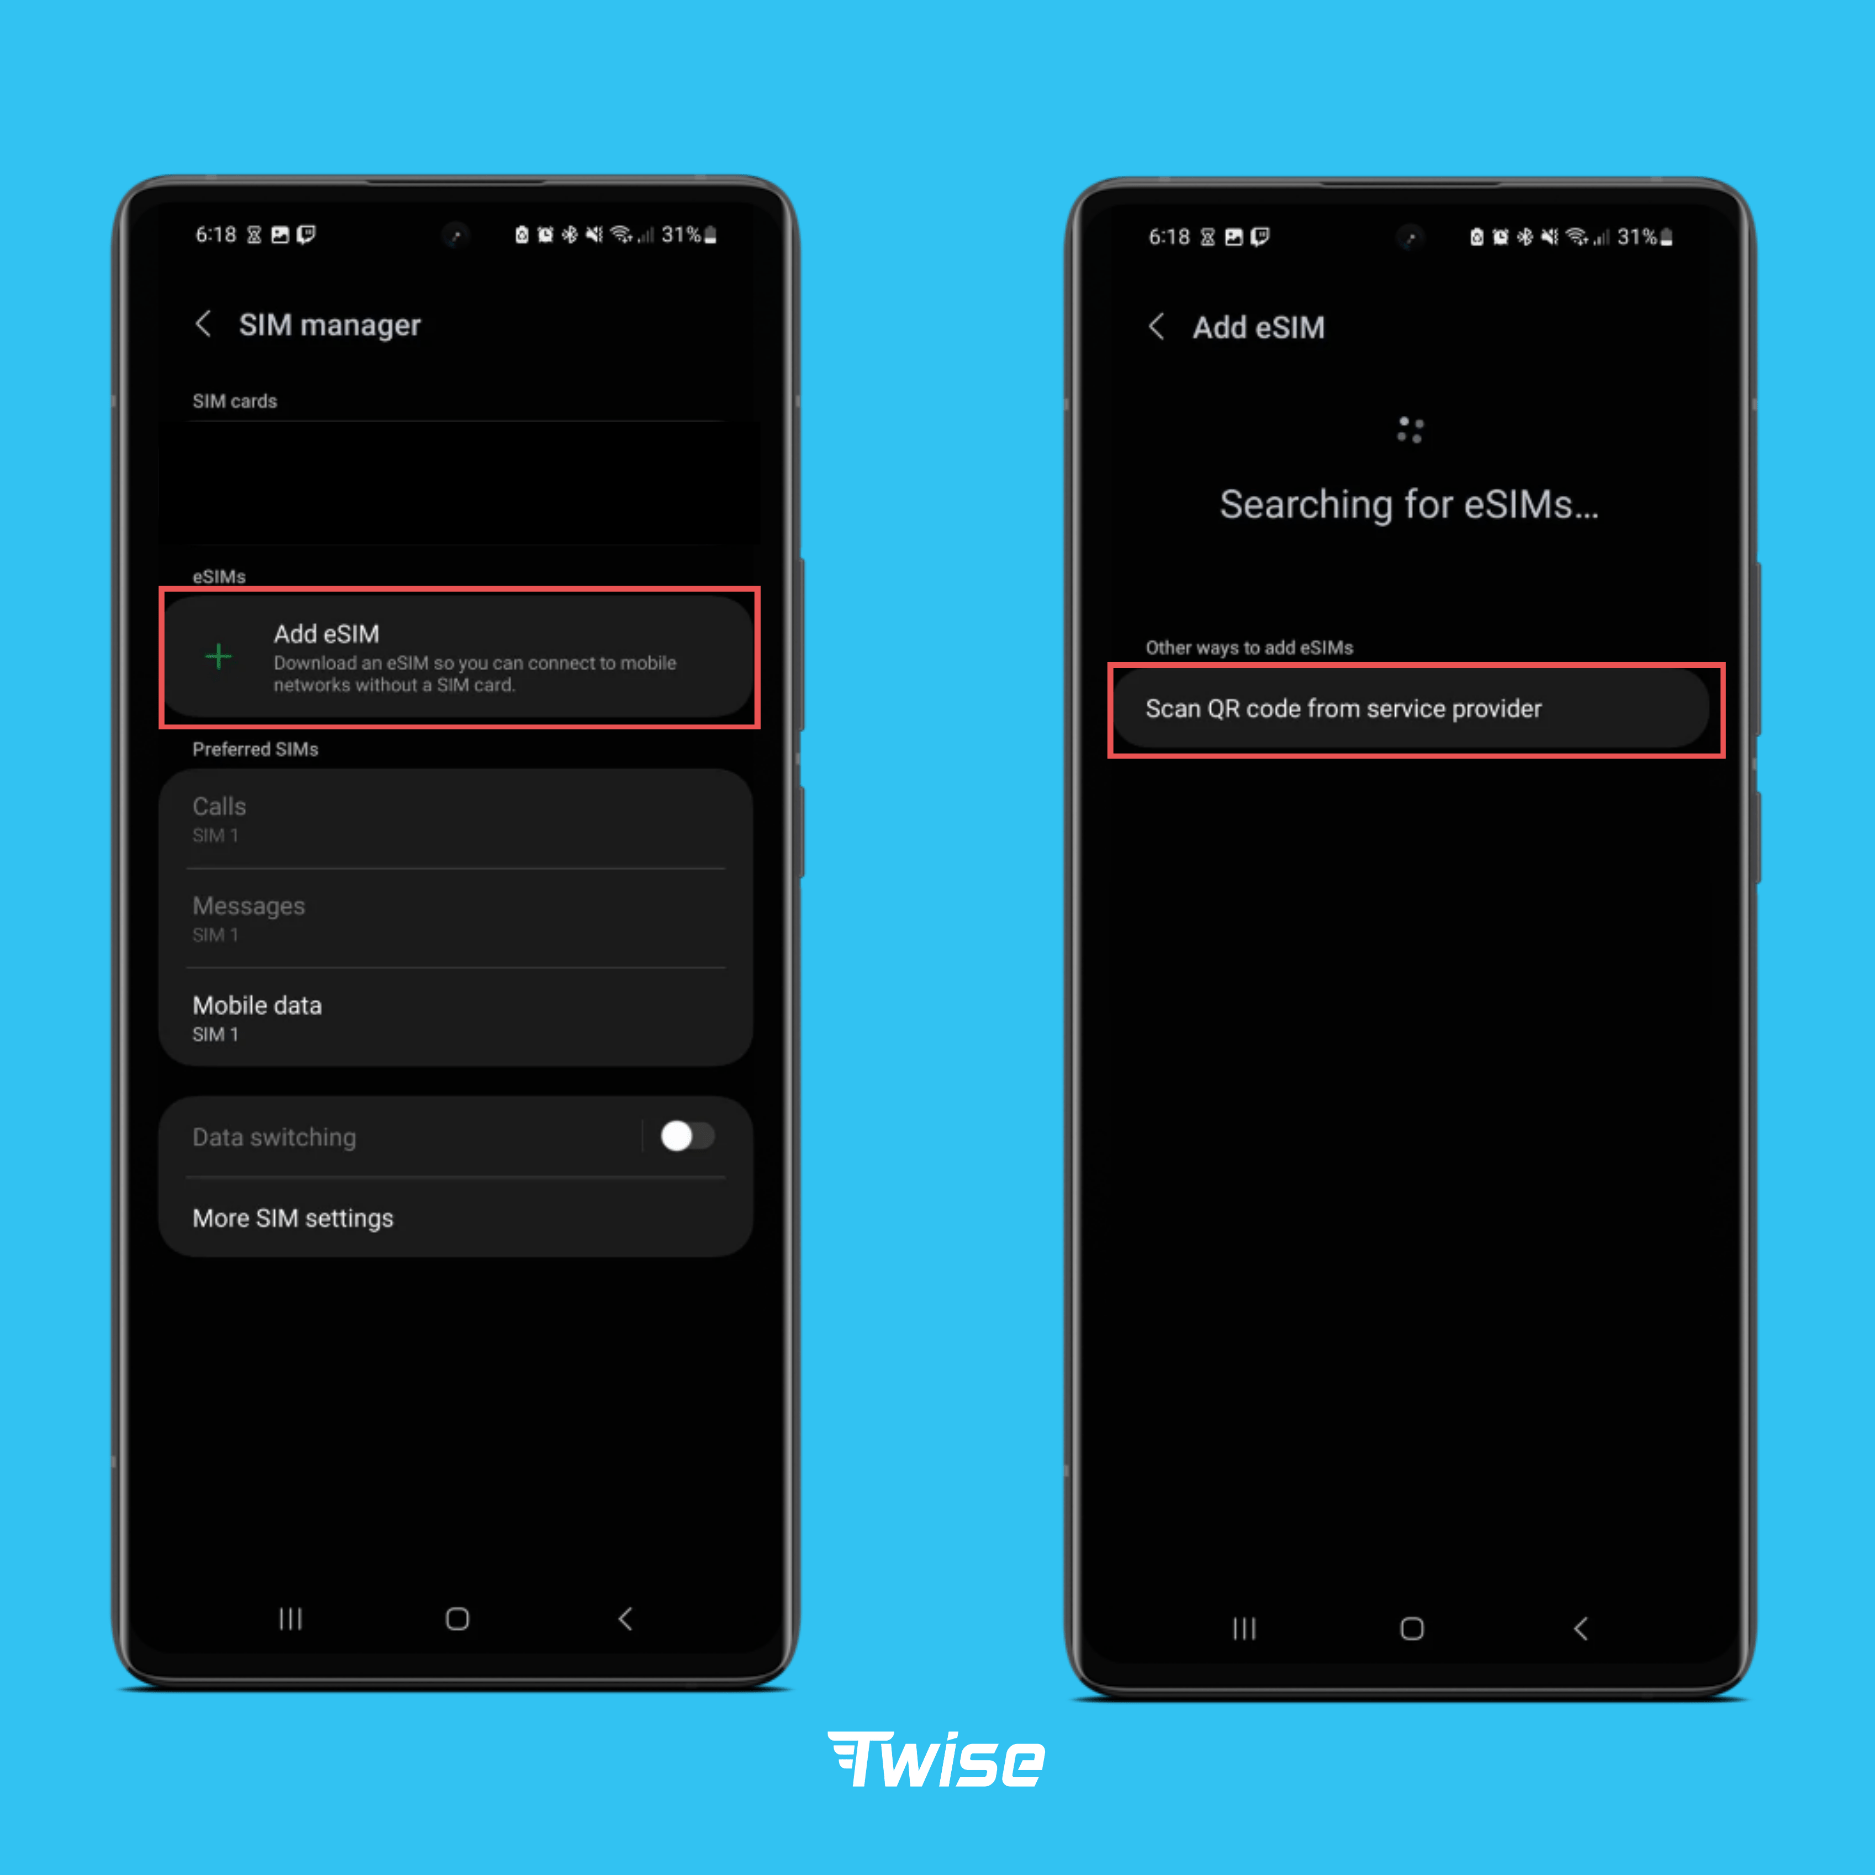
Step 1: Go to Settings → Connections → SIM Manager
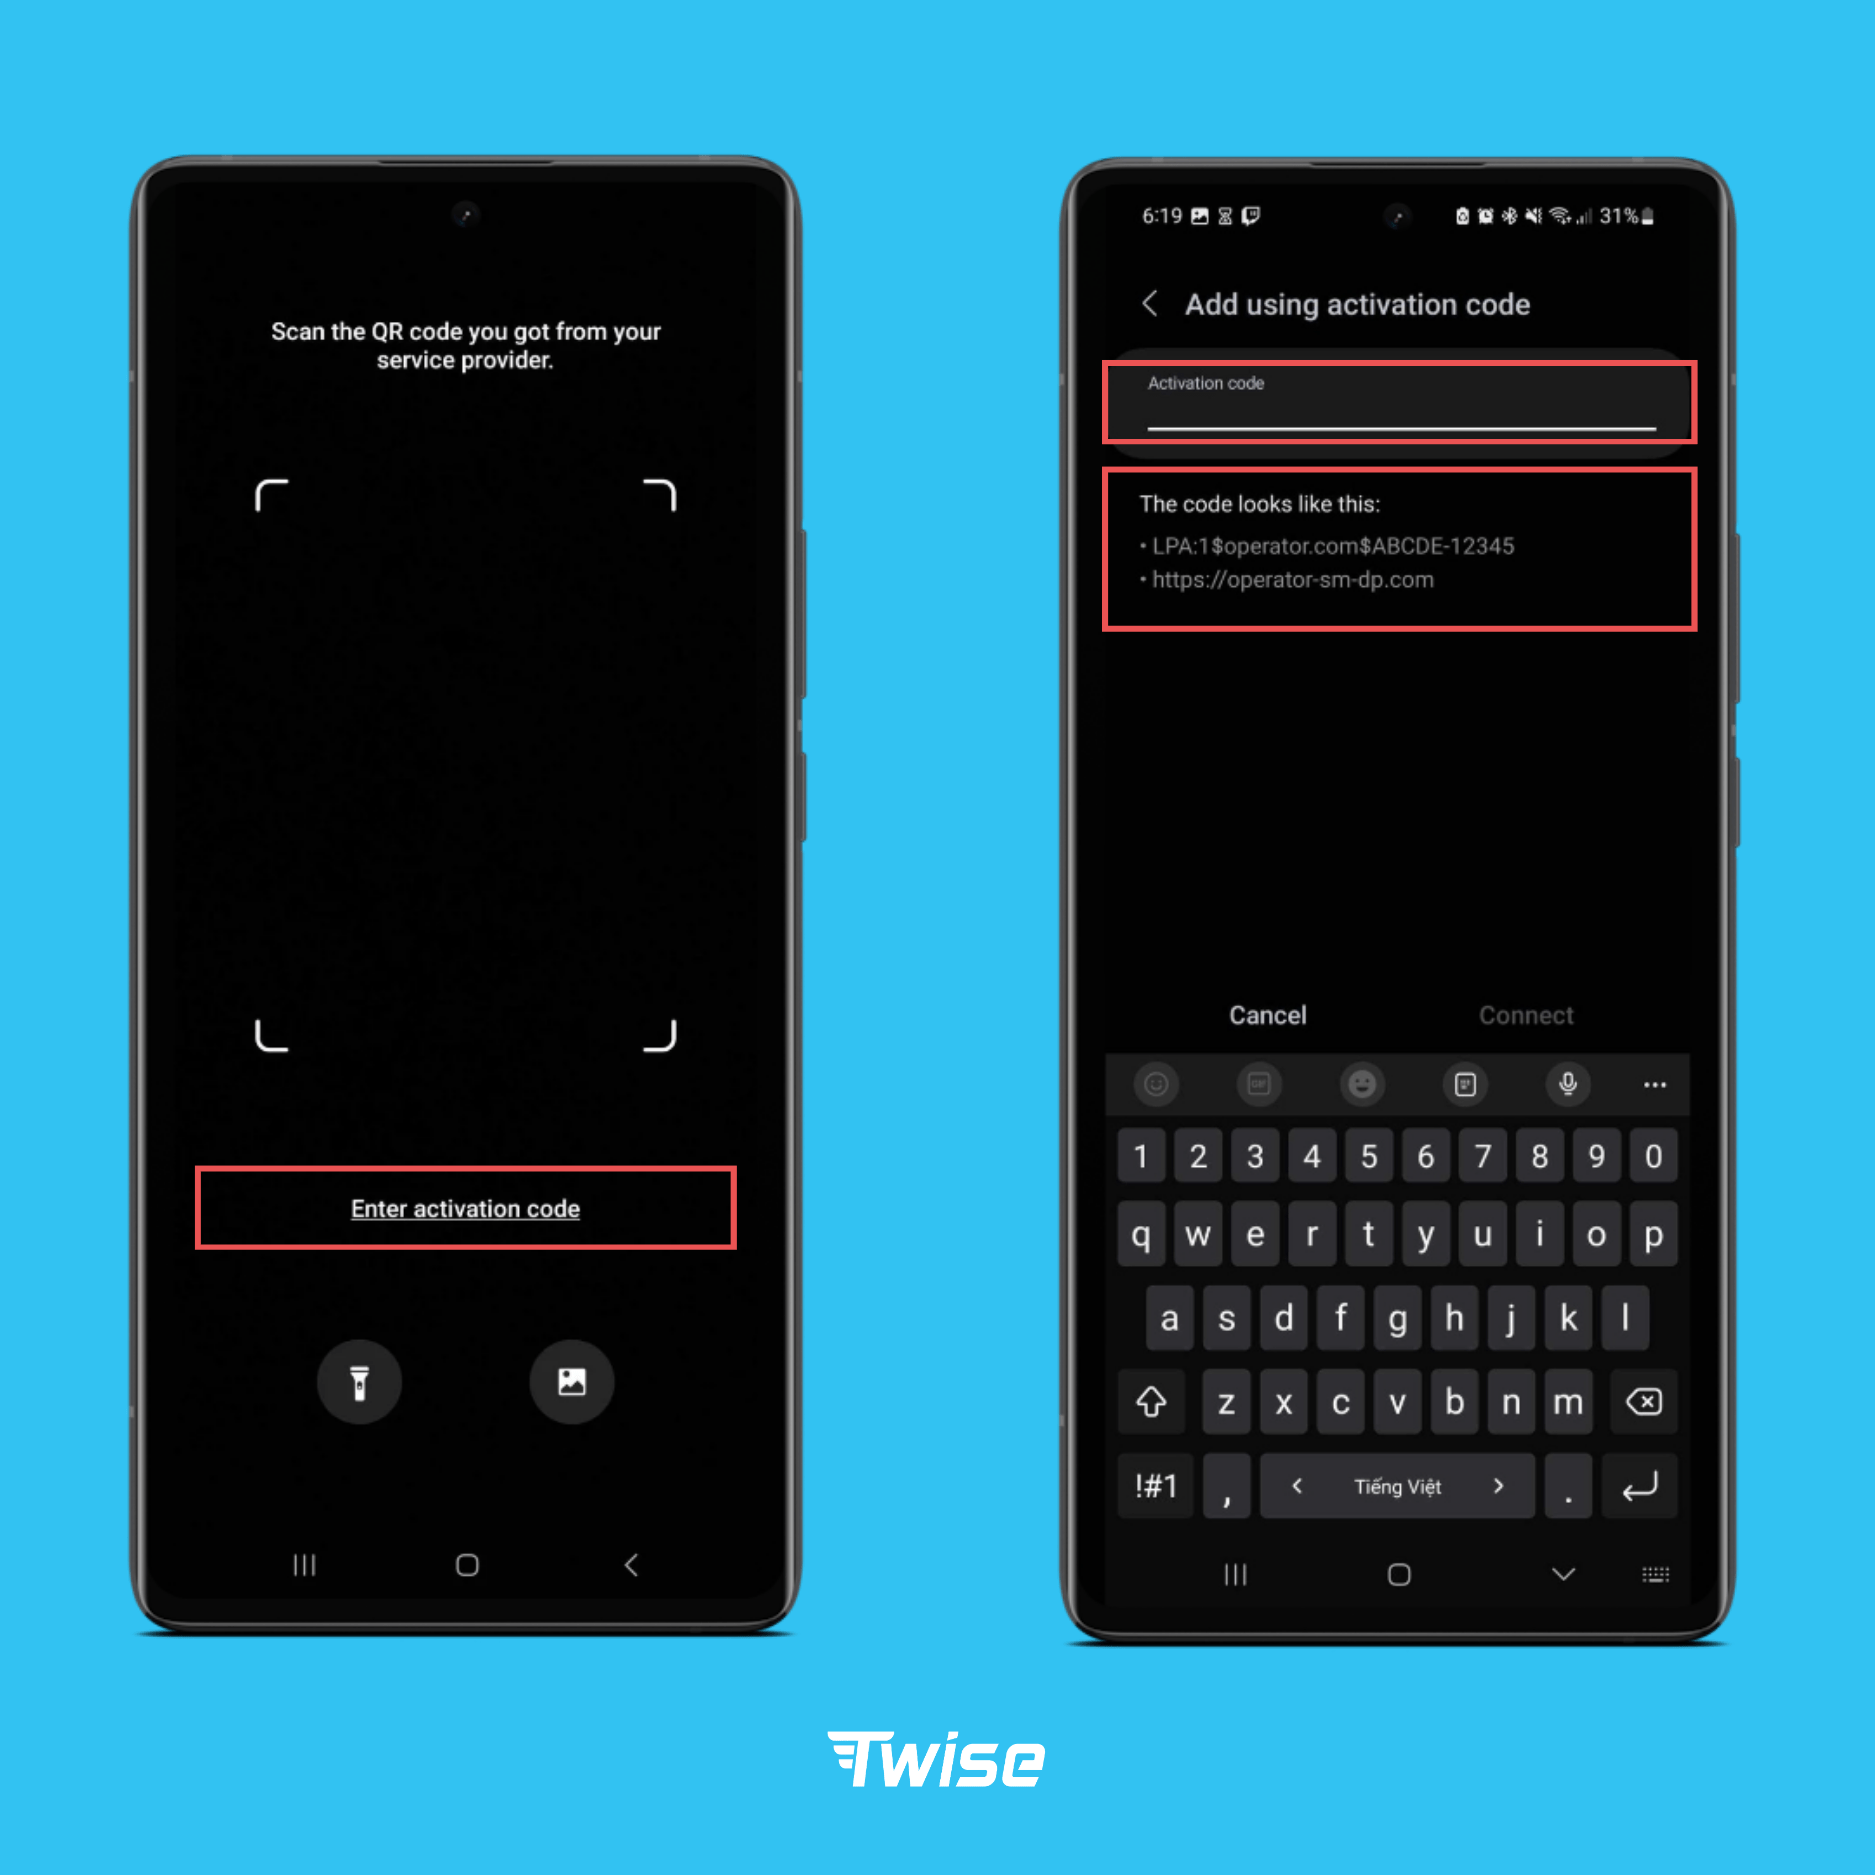
Step 2: Choose to Add eSIM → Scan QR code from service provider → Click to Enter activation code
Step 3: Input Address SM-DP+ and Activation code provided, and then click Next to finish adding eSIM to the device!
2. Activate add eSIM
To be able to successfully activate an eSIM, you need to make sure you’re in a country where eSIM is supported:
Step 1: Once you arrive, connect to the airport wifi to start the eSIM activation process
Step 2: Go to Settings → Connections → SIM Manager, select the installed eSIM labeled “Twise” and turn it on.
Step 3: Enable data roaming for this eSIM: Go to Connections → Mobile networks → Enable data roaming
Above are the most detailed instructions that can help you easily install eSIM anywhere. If you have any questions about eSIM settings, please leave a question and we will assist you!
For iOS phones, please see Installing eSIM on Iphone: A Step-by-step Guide:
Installing eSIM on Iphone: A Step-by-step Guide